
How to set up KVM on Ubuntu 22.04
KVM is an open-source virtualization technology that allows running multiple virtual machines (VMs) on a single physical host machine. It leverages the Linux kernel to provide efficient and secure virtualization capabilities. KVM is advantageous for several reasons. Firstly, it offers a near-native performance by directly utilizing the host system's hardware resources. This ensures the efficient execution of VMs without significant overhead. Secondly, KMV benefits from the robustness and stability of the Linux kernel, providing a solid foundation for virtualization. Additionally, KMV supports a wide range of guest operating systems, making it versatile and flexible. It also offers features such as live migration, snapshotting, and resource allocation control.
In this blog post, I will show you how to install KVM on your Linux system and unlock a world of flexible virtual machine management!
Prerequisites for the Installation
You will need a computer that runs Ubuntu 22.04 and supports virtualization. We will need to confirm if your machine will support KVM before we actually dive into the installation process. To do so, run the commands mentioned below.
egrep -c '(vmx|svm)' /proc/cpuinfo
If you get "0" as an output when you run this command on your system, your system won't support KVM. You'll be fine if you get any number as long as it is not "0". Next, install a utility called kvm-ok by running the command mentioned below.
sudo apt update
sudo apt install cpu-checker
Once you are done with the installation, run kvm-ok!
kvm-ok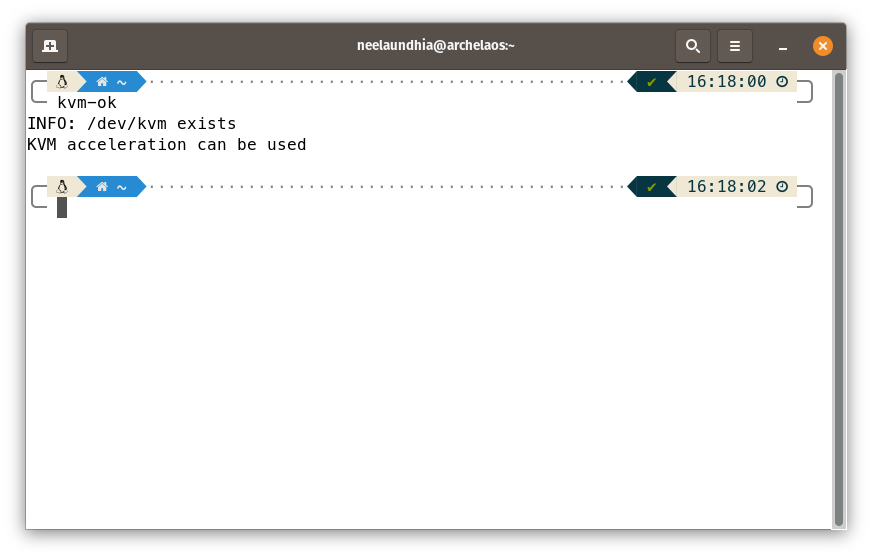
If you get a message saying that "KVM acceleration can be used", you are all set to proceed to the actual installation. If you get a failure message, you might need to either enable virtualization from your BIOS or try with a different host.
Installation
The installation itself will be carried out in three major steps:
- We will first install the libvirt daemon along with some associated packages.
- We will then add your primary user to the libvirt and kvm groups.
- Once the daemon is running, we will optionally install the virt-manager GUI.
Step-1: Installing the needful packages from APT
- First, we need to update our package and dependency information from all the configured sources. Running "sudo apt update" before installing a new package on Linux is recommended to ensure that you have the most up-to-date package information and dependencies available. This command updates the local package repository cache, fetching the latest package lists from the software repositories. By doing so, you can avoid potential conflicts, ensure package compatibility, and benefit from any bug fixes or security patches that may have been released since the last update.
sudo apt update- Once this is done, you can install the libvirt daemon itself. Unless you know what you are doing, it is recommended to use the libvirt-daemon-system instead of libvirt-daemon.
sudo apt install qemu qemu-kvm libvirt-daemon-system libvirt-clients bridge-utils- Now, let's confirm if everything is set up and running correctly by checking the status of the libvirtd service. You are good to go if you see "active (running)" in green.
sudo systemctl status libvirtd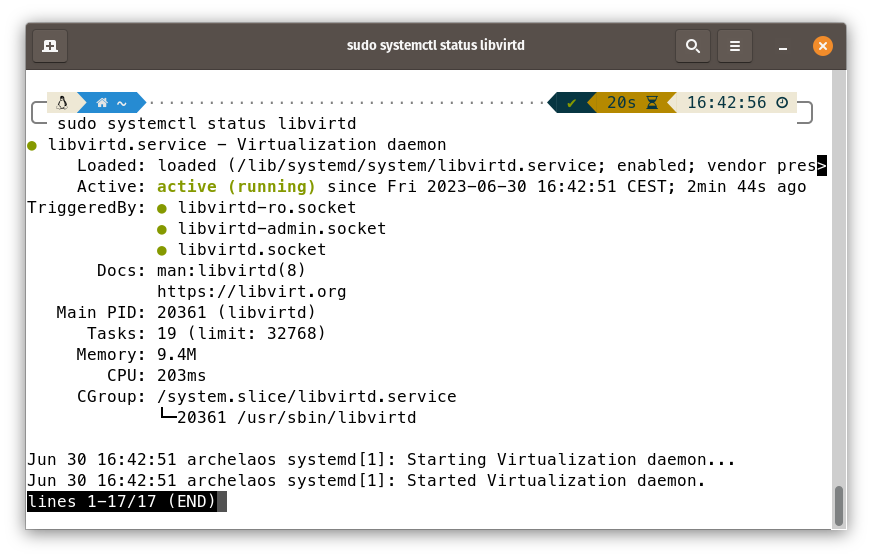
Step-2: Add your User to the groups "libvirt" and "kvm"
In the way we have installed KVM, only the members of the libvirt and kvm groups can work with virtual machines. To be able to manage the virtual machines without needing to escalate to root, you need to add your user to the kvm and libvirt groups. To add your user to the libvirt group, you need to use the command usermod with some arguments as shown below.
sudo usermod -aG libvirt $USER
sudo usermod -aG kvm $USER
Once you have done this, you may restart your system to re-evaluate the permissions for your user and make sure everything works as one would expect. Once you have restarted, to check the groups your user belongs to, just type the following command.
groups $USER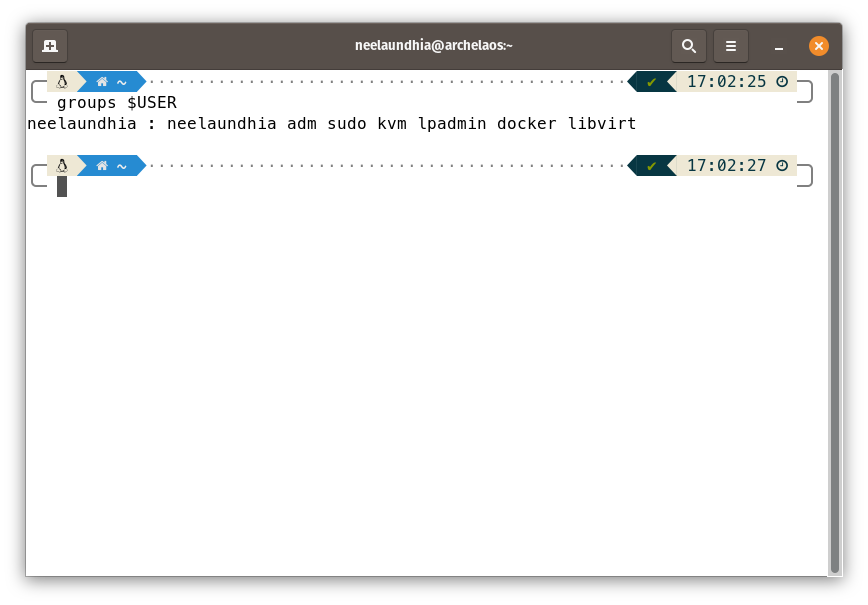
Step-3: Installing virt-manager GUI
In order to manage virtual machines in KVM with ease, the virt-manager GUI comes in handy. To install it, run the following commands.
sudo apt update
sudo apt install virt-manager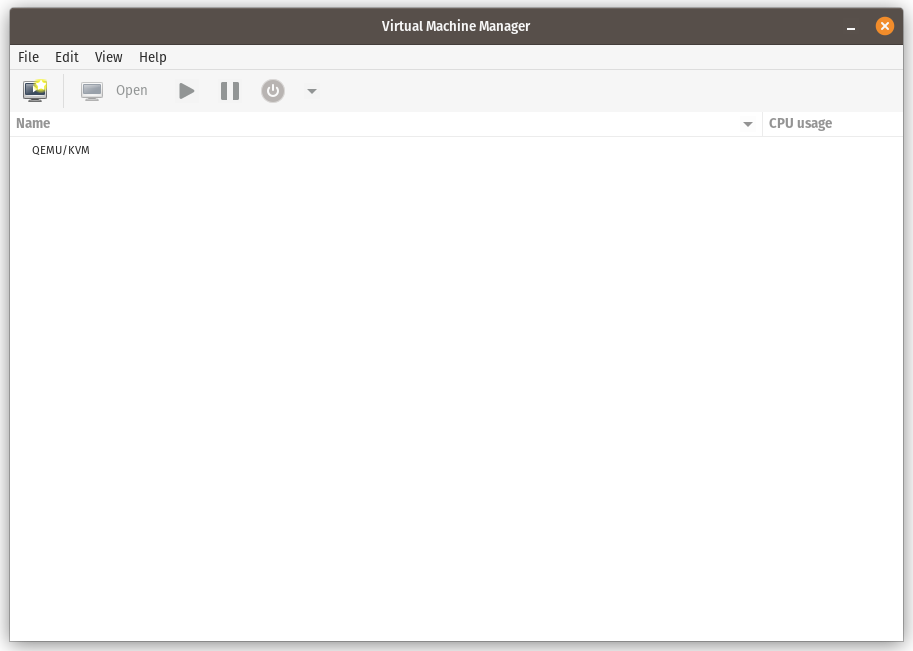
You can now proceed to create your virtual machines on KVM and explore the power of native virtualization in Linux! I will soon be posting more articles on how to create and manage virtual machines on KVM covering some moderate to advanced features of the platform in detail.
